
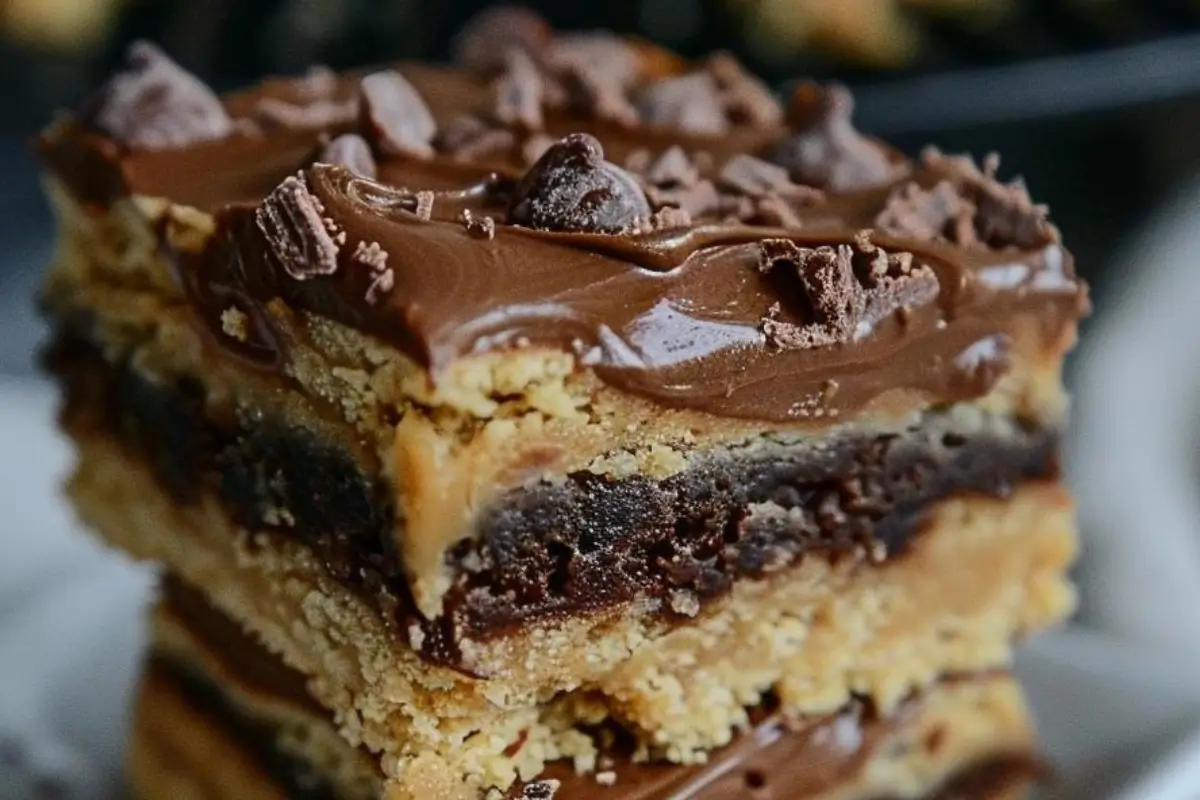
Are you ready for a dessert that marries the irresistible flavors of peanut butter and chocolate in a wonderfully indulgent way? If so, our Fudge Filled Peanut Butter Cake Bars are a must-try. These bars offer a perfect blend of creamy, nutty, and chocolatey layers that will make your taste buds sing!
Why You’ll Love These Cake Bars
- Flavorful Fusion: Combining peanut butter with chocolate is a classic pairing that never disappoints.
- Easy Preparation: Using a boxed cake mix means fewer ingredients and less time in the kitchen.
- Versatile Serving Options: Perfect for dessert, a snack, or even a special treat in lunchboxes.
Ingredients You’ll Need
For the Cake Layer:
- 1 box of yellow cake mix
- 2 eggs
- ½ cup melted butter
- 1 tsp. vanilla extract
- ½ cup peanut butter
For the Fudge Filling:
- 2 cups chocolate chips
- 1 can sweetened condensed milk
- 2 Tbsp. butter
Step-by-Step Directions
- Prep Your Pan and Preheat: Start by lining a 9×13 inch baking pan with nonstick foil and preheating your oven to 350°F (175°C).
- Mix the Cake Batter: In a large bowl, mix together the yellow cake mix, eggs, melted butter, vanilla extract, and peanut butter until smooth. Pour half of this batter into your prepared pan, spreading it evenly.
- Make the Fudge Filling: In a microwave-safe bowl, combine the chocolate chips, sweetened condensed milk, and butter. Microwave until the chocolate melts and the mixture is smooth, stirring occasionally. Then, pour this luscious fudge over the first layer of cake batter.
- Add the Top Layer: Dollop the remaining cake batter over the fudge layer, trying to cover as much of the fudge as possible.
- Bake to Perfection: Bake in the preheated oven for 20-25 minutes, or until the edges begin to pull away from the sides of the pan. This is your cue that they’re done!
- Cool and Serve: Allow the bars to cool before slicing. These are delicious as is or enhanced with a drizzle of melted peanut butter on top.
Nutritional Information
Each serving contains approximately 389 calories. The recipe yields about 12 servings.
Serving Suggestions
- For Extra Indulgence: Add a scoop of vanilla ice cream on the side or a sprinkle of sea salt over the top for a sweet and salty effect.
- Storage Tips: Keep these bars in an airtight container at room temperature for up to 5 days, or freeze for longer storage.
Whether you’re making these for a gathering or just a treat for the family, Fudge Filled Peanut Butter Cake Bars are sure to delight. Try this recipe today and enjoy the harmonious blend of flavors that only peanut butter and chocolate can provide! Happy baking!
Frequently Asked Questions
Can I use a different type of cake mix? Yes, you can use any cake mix flavor you prefer. While yellow cake mix provides a neutral, sweet base that complements the peanut butter and chocolate, using chocolate or even a white cake mix could also be delightful alternatives.
What can I use instead of peanut butter? For those with nut allergies or preferences, alternatives like almond butter, cashew butter, or even sunflower seed butter can work well in this recipe. Each will bring a unique flavor to the bars.
Can this dessert be made gluten-free? Absolutely! To make these cake bars gluten-free, simply use a gluten-free cake mix and ensure all other ingredients used are certified gluten-free, particularly the peanut butter and chocolate chips.
How should I store these cake bars? Store the cake bars in an airtight container at room temperature for up to 5 days. For longer storage, they can be refrigerated for up to 10 days or frozen in an airtight container for up to 3 months. Thaw at room temperature before serving.
Can I make these cake bars vegan? To make these cake bars vegan, use a vegan cake mix, substitute eggs with an appropriate vegan alternative like flax eggs, and use vegan butter and vegan-friendly chocolate chips. Also, replace the sweetened condensed milk with a vegan condensed milk option.
